Wednesday, November 24, 2010

Porting an Application to iPhone Using Flash CS5

Last week saw a very significant development in the relationship between Apple and Adobe. Flash is back in the iPhone picture. In this tutorial, I will show you how to convert an exisiting Flash movie to an iPhone application using Flash Professional CS5.


Step 1: Choose a Flash App

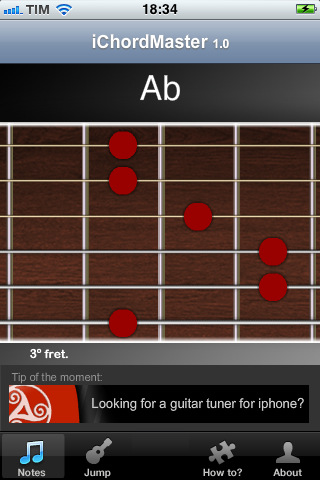
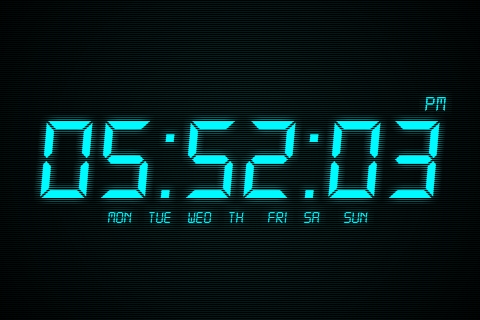
The first thing you need to do is select the application that you want to port. In this example we’ll be working with the Digital Clock app we created in another ActiveTuts+ tutorial.


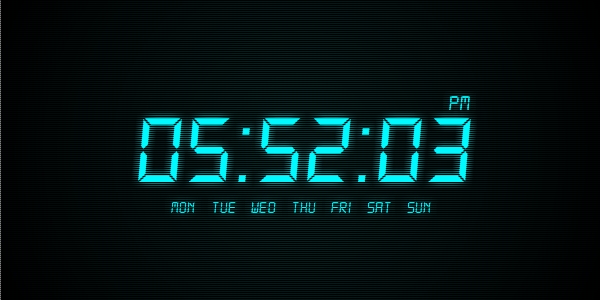
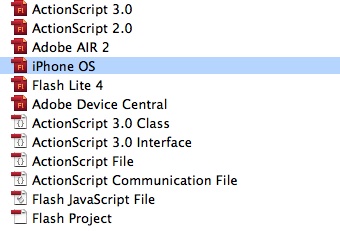
Step 2: Create a new iPhone OS File


Launch Flash CS5 and create a new iPhone OS Document.
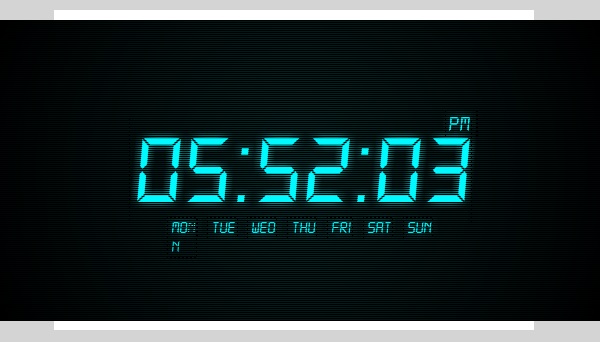


Step 3: Landscape


As you can see, the default stage size is 320×480 px, which is the iPhone full screen resolution in portrait mode (this is holding the iPhone vertically).


However, this application is has a Landscape format and it won’t look good if we adapt the interface to Portrait. Your first instinct is probably to rotate the interface 90° and build the app that way. It will work, but it will be very difficult and you will probably end up with neck pain. For this reason Flash CS5 includes a Publish option to make the iPhone application in landscape mode.


Set the stage size to 480×320 px and continue with the next step, we’ll see how to set the app to Landscape mode in step 10.


Step 4: Interface


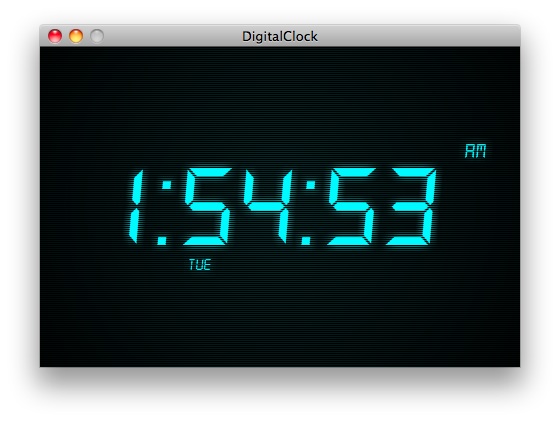
To port the interface, a simple copy and paste will be enough. Yes, it’s that simple!


However, in most cases you will need to optimize the graphics, which involves size, alignment and the balance between vectors and bitmaps. Since we are using simple graphics, we’ll focus on the alignment and the size of the elements.


Step 5: iPhone Adjustments


The original application size doesn’t match the iPhone size, so the first thing to do is change the background size to fit the stage.


The current size of the clock text will look too small in the iPhone, select it and change the size to 120px.


Step 6: Class File


Copy and paste the class file to the source folder, no changes need to be made to this file.


Step 7: Document Class


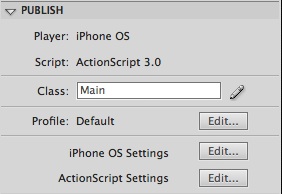
Remember to add the class name to the Class field in the Publish section of the Properties panel.


Step 8: Test for Errors


You can now test your movie to see if everything works as intended.


Step 9: iPhone OS Settings


Here comes the part you’re interested in; the iPhone part.


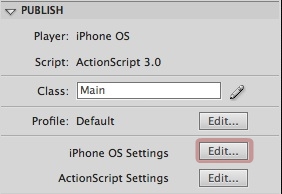
Now you have a perfectly working Flash movie, it’s time to convert it to an iPhone application. Go to the Properties panel, Publish section and press the iPhone OS Settings button.


Step 10: General


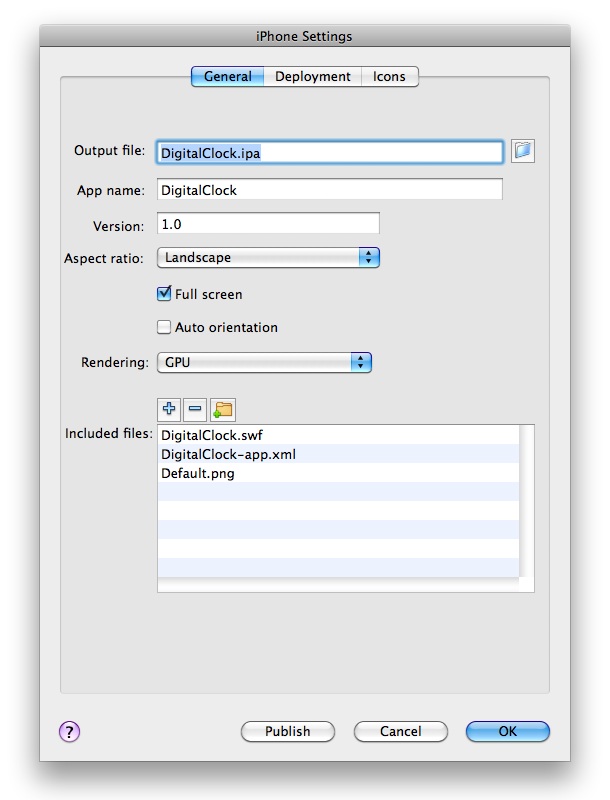
You will now enter a window full of settings. These settings are:


  • Output File: The name of the ipa file that will be created, this can be whatever you want.

  • App Name: The name that will be shown in your iPhone below the icon.

  • Version: The current version of the application; you need to edit this on every test for iTunes to update the app succesfully.

  • Aspect Ratio: The view mode of your app.

  • Full Screen: Hides the top info bar (signal, bluetooth, wifi, battery, etc).

  • Auto Orientation: Uses the accelerometer to change the orientation without writing code.

  • Rendering: A very important option, using the gpu for rendering in complex graphics applications will highly increase the performance.

  • Included Files: The files to be included with your app. If you are loading content from an XML, TXT or any other source you should add those files here.


Step 11: Launch Image


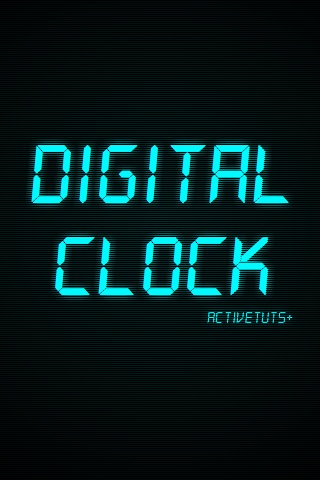
Every iPhone application displays an image at launch while loading the essentials to show the app. This image is the Default.png file we included in step 10. It’s recommended to show the same screen that the app will show when fully loaded, but you can use it to show your company logo, loading screen, title screen, or any other useful info.


The image must be 320×480 it doesn’t matter if you’re working in landscape mode.


Step 12: Deployment


For the Deployment tab, you will need to be a member of the iPhone Developer Program and follow the instructions in the Provisioning Portal to get the necesary files to compile your application.


Step 13: Certificates


There are three different kinds of certificates. The first is the Apple Worldwide Developer Certificate (WWDC). This certificate is compiled alongside one of the other two certificates: either a Developer certificate or a Distribution certificate. These are used for testing applications and deploying to the Apple Store, respectively.


Step 14: Provisioning Profile


The Provisioning Profile is basically a file that states which application we’re testing and on which devices can we test it.


Step 15: App ID


An Identifier of your application, each application ID is required to have its own unique namespace that looks something like com.yourcompany.YourApp. This is also generated in the developer program site and included in your provisionig profile.


Step 16: Deployment Type


Select an option depending on the kind of certificate and provisioning profile you’re working with. A Developer Certificate can be used for Quick Publishing and a Distribution Certificate is needed for deployment, using this kind of certificate will create an app ready to be submitted to the app store.


Step 17: Icons


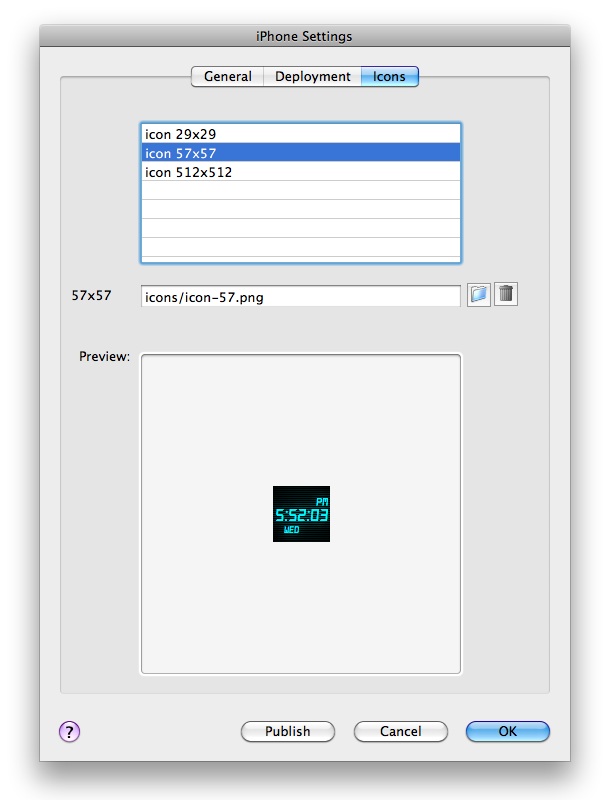
Next is a simple one, the Icons tab.


Three sizes of icons must be used 29x29px, 57x57px (this is the icon shown in the device) and 512x512px. Don’t worry about the round corners, iTunes will automatically generate them.


Step 18: Publish


When you’re done filling the settings press the Publish button, a progress bar will appear showing the remaining time. The time it takes depends on your application and the files included. Also, more time is needed when publishing for deployment.


Step 19: Device Testing


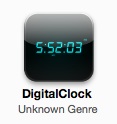
An .ipa file will be created in your source folder, drag it or double-click it to open in iTunes. You will see the icon of your app with the other applications.


Sync your iPhone and get ready to run your new app!


Step 20: Submit App


If you’re done porting your prefered application to iPhone and want to share it with the rest of the world, you can submit it to the App Store. Login at iTunes Connect and follow the guided instructions.


Conclusion

Now you know how easy it is to develop iPhone applications using Flash Pro CS5, start making your own!I hope you liked this tutorial, thank you for reading!

Original Link

Monday, November 22, 2010

iPhone GUI PSD Version 4

Updated: Get the Retina version here

Now in its fourth iteration, this version of the template has been completely redesigned from the ground up. Based on iOS4, it includes all the elements you need to design proof-of-concepts or production ready assets. Previous versions of this file we’re riddled with issues like blurry edged buttons and incorrect “bevels”. These issues have been addressed as best they can using Photoshop’s shape layers and layer styles. If you’re modifying any of the vector elements be sure the shapes are sitting on full pixels or your assets will begin to look blurry.

It should be noted that this file is still formatted for 480×320 resolution. The Retina Display version of this file will be posted once we’re able to get our hands on a production unit. We’ll also be updating the iPad version of this file, since it too needs some TLC.

If you like it or use it, help us out by retweeting it.

Download The iPhone GUI PSD Here (7.9MB)

Original Link

New app (iChordMaster)


link: http://itunes.apple.com/us/app/ichordmaster/id404052405?mt=8

Using screen orientation APIs for smartphone application development

When you develop application for smartphones, you cannot take for granted the physical orientation of the actual device—as you can, of course, when developing apps for desktops. Accelerometers are increasingly being included in smartphones and enable them to detect motion, vibration, and physical orientation. Accelerometers are increasingly being included in smart phones and enable them to detect motion, vibration, and physical orientation. Adobe AIR 2 includes APIs to access that data.

In Adobe AIR 2, two sets of APIs enable you to use accelerometer data: the screen orientation APIs and the accelerometer APIs. The screen orientation APIs discussed in this article provide properties and methods for dealing with changes in—and accessing information about—the physical orientation of the device. They also provide you with ways to rotate the content or stage on the screen so that it is easier to view on the device. The accelerometer APIs, which are outside of the scope of this article, provide access to the raw data from the accelerometer.

Orientation overview

When utilizing the screen orientation APIs, you must understand two important concepts: the actual physical orientation of the device itself, and the orientation of the screen in relation to the device. The best way to explain this is to look at Figure 1. It is important to note that while they're sometimes related, these two values can be different depending on your application configuration, and there are two different APIs for accessing this information.

Device orientation

Orientation of the app consistent with the device
Figure 1. Orientation of the app is consistent with the device, no matter how it is moved relative to the user. (Photo courtesy of Allen Ellison.)

Physical orientation is the actual orientation of the device in real space. This value is completely independent of anything that is happening in the software or how the content is presented. In ActionScript we access this information from within the Stage class using the deviceOrientation property. The deviceOrientation property is read-only and cannot be changed by the developer at runtime or in the application descriptor file. Valid values for this property can be found on the StageOrientation class and include DEFAULT, ROTATED_LEFT, ROTATED_RIGHT, UPSIDE_DOWN and UNKNOWN.

The value of the deviceOrientation property changes as the device's accelerometer detects movement and changes in the position and orientation of the device. To detect changes to the physical orientation of the device, you can listen for two events that are dispatched when the accelerometer detects changes: StageOrientationEvent.ORIENTATION_CHANGING and StageOrientationEvent.ORIENTATION_CHANGE. The ORIENTATION_CHANGING event is dispatched as the application detects that a change is occurring and before any default behaviors such as auto-orientation (discussed later) actually occur. The ORIENTATION_CHANGE event occurs after any default orientation behaviors occur.

Both events will give you information on the orientation before and after a change in the position or orientation of the device through the afterOrientation and beforeOrientation properties.

Note: There could be a period of time in between these events being dispatched as the operating system changes the actual stage orientation of the content on the device. In the next section I will show you how to change the stage of your application in relation to these events.

Here's how that works in code:

stage.addEventListener( StageOrientationEvent.ORIENTATION_CHANGING, onOrientationChanging ); stage.addEventListener( StageOrientationEvent.ORIENTATION_CHANGE, onOrientationChange ); function onOrientationChanging( event:StageOrientationEvent ):void { trace("The current orientation is " + event.beforeOrientation + " and is about to change to " + event.afterOrientation ); } function onOrientationChange( event:StageOrientationEvent ):void { trace("The orientation was " + event.beforeOrientation + " and is now " + event.afterOrientation ); }

Stage orientation and auto-orientation

While it is important to know and detect changes in the actual device itself, in most cases you will want to update the content on the screen to match the device's orientation and provide the user with a good experience no matter how they are holding the device (see Figure 2).

Auto-orienting the screen in response to movement
Figure 2. Auto-orienting the screen in response to movement, from portrait (left) to landscape (right). (Photo courtesy of Allen Ellison.)

By default, the application will attempt to orient the stage to one of four orientations (DEFAULT, ROTATED_LEFT, ROTATED_RIGHT, UPSIDE_DOWN) to match the physical orientation of the device. This feature is called auto-orientation. The benefit of this behavior is that, as a developer, you will not be required to rotate objects on the display list to display them correctly because the entire stage itself is rotating. Stage resize events will also be dispatched as the stage rotates so that your content can resize appropriately to the new stage size. You will also receive the orientationChanging and orientationChange events as described in the previous section.

In some cases you may want to disable auto-orientation to force the user to use your application in only a single orientation; or you may want to handle resizing the stage and rotating objects yourself. You can accomplish this with the existing APIs in two ways.

First, you can modify the application descriptor file. This requires you to modify the autoOrients property and set it to false. While you will still receive the ORIENTATION_CHANGE and ORIENTATION_CHANGING events when the actual device orientation changes, the stage will not update to try and match that orientation. Here's how this setting would look in the application descriptor file:

... ... false

The second way to prevent the auto-orientation behavior is to listen for the StageOrientationEvent.ORIENTATION_CHANGING event on the stage and call the preventDefault() method on the event object. If you do not call preventDefault(), the stage will auto-orient as expected to the afterOrientation value that is found on the event object. Here's how you'd express that in code:

stage.addEventListener( StageOrientationEvent.ORIENTATION_CHANGING, onOrientationChanging ); public function onOrientationChanging( event:StageOrientationEvent ):void { event.preventDefault(); }

To detect the current orientation of the stage, use the read-only property orientation on the stage class. By default, the orientation of the stage when applications are deployed to iOS devices will be in the DEFAULT (or portrait) orientation. The application can be set to start in landscape orientation in the application descriptor file. To change this behavior, in the application descriptor file modify or add the tag in the tag with a value of portrait or landscape. When set to landscape, the application opens with the stage in the ROTATED_RIGHT or ROTATED_LEFT orientation:

... ... landscape

You can also modify the stage orientation manually by calling the stage object's setOrientation() method and passing in one of the valid values defined in the StageOrientation class. This method will immediately change the stage orientation independent of the physical device orientation:

stage.setOrientation( StageOrientation.UPSIDE_DOWN );

Sample use cases

By using these configuration settings, properties, and methods, you can support almost any use case when it comes to modifying or detecting changes in screen and device orientation. Here are a few quick examples to illustrate some common use cases.

Supporting landscape mode only

To support landscape mode only, the sole modifications you need to make are to the application descriptor file's autoOrient and orientation properties. This will prevent the application from auto-orienting or changing the stage orientation. While you will still receive events when the physical device orientation changes, the stage will not change orientation during the application lifecycle. Here's how that works in code:

... ... false landscape

Modifying the application when orientation changes

Sometimes you may want to show an entirely different view when the orientation changes instead of just letting the current view resize. To accomplish this you can listen for the orientationChanging event and modify your application and content appropriately:

var landscapeView:MovieClip; var portraitView:MovieClip; stage.addEventListener( StageOrientationEvent.ORIENTATION_CHANGING, onOrientationChanging ); function onOrientationChanging( event:StageOrientationEvent ):void { var isPortraitView:Boolean = (event.afterOrientation == StageOrientation.UPSIDE_DOWN || event.afterOrientation == StageOrientation.DEFAULT ); portraitView.visible = isPortraitView; landscapeView.visible = !isPortraitView; }

Supporting portrait mode only

In some cases, you may want to support specific orientations of the application, or in this case the DEFAULT and UPSIDE_DOWN orientation of the screen. This way, you will not have to implement a landscape mode for the application, but can allow the device to be held by the user in multiple directions and have the screen update appropriately. The following code implements this:

stage.addEventListener( StageOrientationEvent.ORIENTATION_CHANGING, onOrientationChanging ); function onOrientationChanging( event:StageOrientationEvent ):void { // If the stage is about to move to an orientation we don't support, lets prevent it // from changing to that stage orientation. if(event.afterOrientation == StageOrientation.ROTATED_LEFT || event.afterOrientation == StageOrientation.ROTATED_RIGHT ) event.preventDefault(); }

Original Link

Wednesday, November 17, 2010

The Impact of Flash on the gaming industry

Considering the fact that this blog is meant to discuss all things Flash it was only a matter of time till we would’ve had to tackle the area of gaming.

Let’s play…

During the past half of decade or so Flash has become an increasingly popular video game development choice for companies or passionate individuals who are interested in giving a form to their vision while also making a buck if possible.

Flash has become so widespread that there is an entire genre of games named after it, they are called “Flash games” and this is due to many unique characteristics that set them apart from other video games.

One such characteristic would be that Flash games are ever-present on the web so much so that there are many sites that contain exclusively games made with Flash. These represent what is known in the gaming industry as the casual gaming market which usually refers to small video games meant to relax or disconnect the player from their daily routine.

Casual games aren’t your typical console or computer game, they don’t have neither the cost or complexity associated to them in fact this is one of their advantages. Usually they’re found on the Internet and you can either download some or play them in your Internet browser, similarly some might require you to purchase them after a trial period or stage but their prices are ridiculously small compared to more serious games. However most Flash based games you will find out there will be free to play, they won’t be extremely complex or feature great graphics but then again they are supplied for free.

The speed and relative simplicity of developing Flash games makes them suited to being developed by smaller companies or in some cases groups of friends who can then in turn sell their product or offer it for free and while there is no surefire way of obtaining success there are many examples out there of games and concepts that are still going strong long after their initial release.

Flash games benefit from the versatility of Flash so that one can create or recreate pretty much any type of game genre with the help of Flash however the most common Flash games are puzzle games, platform games, strategy games and first-person-shooter games. Of course these aren’t all the categories by far and they in turn can be divided into several other categories but these are the most common you are likely to find.

Flash has proven so versatile that there are many mainstream games out there that have smaller Flash versions that are similar to the original product if not in the visual area then at least as far as concept goes. In fact Flash games have started to be used for marketing purposes usually before the launch of a major game, some companies will create a small Flash game which they will distribute for free via their website or create a dedicated website where people can play the game in their browser in order to advertise and create more hype for their upcoming title.

(by FlaDev)

iGuitarMan


This is my first iphone app made using flash and actionscript cs5.
More information Click here .
In two weeks this app has more than 4000 downloads.


Packager for iPhone - (The Beginning)

The Packager for iPhone, which is a feature of Adobe Flash® Professional CS5 software and the Adobe AIR® SDK 2.0.1, offers Flash developers a fast and efficient method to reuse existing code from ActionScript 3 projects to deliver native applications on iOS devices. It is also available as a standalone technology through this release on Adobe Labs.

Apple’s recent announcement that it has lifted restrictions on its third-party developer guidelines has direct implications for the Packager for iPhone. The feature is available for developers to use today and we will now resume development work on this feature for future releases. This is great news for developers and we’re hearing from our developer community that new AIR applications for iOS devices are already being approved for the Apple App Store. We do want to point out that Apple’s restriction on Flash content running in the browser on iOS devices remains in place.

Adobe will continue to work with key industry partners, including Google, RIM, Nokia, Motorola and Palm/HP to enable their device users to browse the full web through Flash Player 10.1 and run standalone applications on AIR. With desktop and new mobile support for Android, BlackBerry™ Tablet OS and iOS, developers can now reuse their code and content to distribute AIR applications on a wide range of devices. We are excited about the great progress our partners are making as they deliver the first smartphones and tablets to market with full Flash support.

Getting Started

Follow these steps to get started with the Packager for iPhone:

  1. Download the Packager for iPhone

    Users of Flash Professional CS5 should get the Flash Professional Update for iOS from the Flash Professional downloads page.

  2. Read the release notes and developer FAQ for detailed information.
  3. Review the Packager for iPhone developer guide
  4. Ask questions or share your feedback in the Packager for iPhone forum

    Please note that your submission of comments, ideas, feature requests and techniques on this and other Adobe maintained forums, as well as Adobe's right to use such materials, is governed by the Terms of Use.

(by Adobe Labs)

First Post

Well, this is my first post.
I'll write a little of what I propose:

This blog will be dedicated to flash developers with an interest in programming to create applications / games for iPhone.

Here we start teaching how to make apple certificate (*. p12) as well as install on your computer (both PC and MAC) as to put the application on the App Store.

He is also a good source of study for those learning to program in ActionScript 3

For those who do not know, I am Brazilian, so I can make some mistakes in my English, but if this happens please let me know.

Goodbye!